Step Line Chart: What It Is and When to Use It


Choosing between a step line chart and a standard line chart comes down to one question: Does your data represent discrete state changes or continuous measurement? This article explains how step line charts answer that question. We'll cover what they are, when they accurately represent your data, how to interpret the horizontal plateaus and vertical risers, and how to build one in Excel or a BI platform.
Key takeaways for step line charts
Here are the quick decisions to make before you choose a step line chart:
What is a step line chart
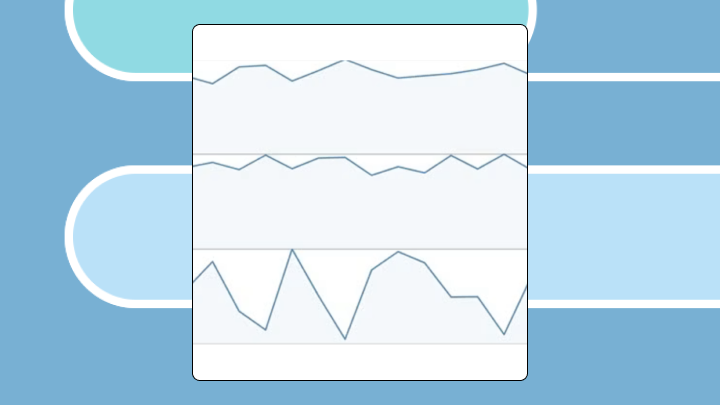
Horizontal and vertical segments separate a step line chart from its diagonal-drawing cousin, the standard line chart. Each horizontal segment shows a value holding steady, and each vertical segment marks the recorded moment the value changed.
Standard line charts draw diagonal lines between points, implying gradual, proportional change. Step lines make a different claim entirely: Nothing changed until the next recorded point. That distinction matters when your data actually behaves that way. Chart choice is a data integrity decision, not a design preference.
You might hear this called a step graph, step chart, stepline, stairstep line, or step plot. Same visualization, different names.
When to use a step line chart
If you're deciding whether or not to use a step line chart, the best question to ask is this: Does your data represent discrete state changes or continuous measurement?
If a value stays in effect until explicitly replaced, step interpolation is accurate. Subscription tiers work this way. So do tax rates, SLA thresholds, and inventory counts after shipments. Many finance, sales, and operations key performance indicators (KPIs) behave the same way; monthly quota resets, tiered commission rates, headcount changes, and policy thresholds do not drift. They flip.
But for continuously sampled data? Standard line interpolation is more honest. CPU utilization, daily temperature highs, sensor readings.
Step charts work well under specific conditions:
Certain data shapes will cause this chart to mislead you. Continuously sampled data creates false plateaus. Gradual change looks artificially abrupt. High-frequency data with many small changes turns into a dense staircase that obscures the actual trend.
Data requirements for step line charts
A chart that renders perfectly can still mislead if the data shape violates assumptions. According to Gartner, 59 percent of organizations do not measure data quality at all. That gap makes it easy to miss the very issues that cause step charts to misrepresent your data.
Your data set needs a time or sequence column sorted in ascending order, plus a numeric value column representing the state at each point. A category column helps if you want multi-line comparisons. An event label column makes annotation easier.
Be explicit about what the timestamp means. Is it the moment the new value became effective (common for pricing, quota, and policy updates), or the moment it was observed or logged? That single choice determines whether step-before or step-after is the honest rendering.
Two points show one transition. Five or more points? That is where you start seeing patterns.
Certain conditions mean the chart renders but should not be trusted:
If you have duplicate timestamps, decide on a tie-break rule before charting (for example, use the final effective update in that time bucket), and then document that rule in the visualization.
Lacking temporal sequence entirely? Use a bar chart instead.
How a step line chart encodes change
Two visual components do the work in a step line chart. Horizontal segments (plateaus) represent duration at a constant value. The length of the line tells you how long that state persisted. Vertical segments (risers) represent the moment of change, and the height tells you how big the jump was.
Step placement determines the timing semantics. This is where most confusion happens:
A price that becomes effective at midnight needs step-before. A price that applies until the next change needs step-after. The same dataset rendered with different step placements tells different stories, and most tools default to one option without asking. If you are unsure which option your tool uses (step-before vs step-after), test it with a simple two-point data set where you know the intended timing.
How to read a step line chart
Viewers sometimes see a long horizontal segment and conclude nothing happened. That segment actually means the value was held constant by design. And frankly, that simple misread can happen even by experienced analysts.
The correct reading order:
Misinterpretation happens when people assume horizontal segments mean no data rather than constant value, or when they read vertical risers as gradual slopes rather than instantaneous jumps.
A quick sanity check: Trace backward from any point. The value at that moment should equal the y-value of the most recent data point to its left (for step-after) or the y-value of the point itself (for step-before).
Variations of step line charts
Step-before and step-after line charts handle timing differently. Use step-before when the new value is effective as of the recorded timestamp, such as an interest rate announcement. Use step-after when the old value applies until the next event, like inventory counts after shipments.
You can build the chart with or without risers. The default version with risers shows both duration and change moment. Removing vertical lines leaves only horizontal segments, which emphasizes duration patterns when the exact moment of change matters less.
Multi-series step lines plot multiple categories on the same axis. This helps compare state changes across product lines or regions. Past three or four series, though, overlapping steps become hard to distinguish.
Step area charts fill the space under the line. Use this when cumulative effect matters, like total hours at each staffing level. Filled areas can exaggerate visual weight, so use them deliberately.
Best practices for step line charts
To build a well-organized step line chart, consider taking care of these items:
Examples of step line charts
A SaaS company may use a step line chart to track monthly subscription price per user. Prices change only when the company announces new tiers. A step line shows exactly when each price took effect and how long each tier persisted. A standard line would imply gradual price increases between announcements, which never happened.
A warehouse my track stock counts with a step line chart. Inventory drops discretely when orders ship and jumps when new stock arrives. A step line shows the actual quantity on hand at any moment. A standard line would suggest gradual depletion, masking stockout risk.
A finance team could use one to visualize central bank rate announcements. Rates hold constant between meetings. A step line shows the exact duration of each rate regime.
An operations team could use step line to track uptime commitments. The SLA threshold changes quarterly. A step line shows which threshold applied during each period, whereas a bar chart would lose the temporal continuity.
Lastly, a sales leader can track quota adjustments and tiered commission rates across quarters with a step line chart. Those rules change on specific dates, then stay fixed. A step line makes it clear when the rules changed, so the team does not confuse a policy shift with a performance shift.
How to create a step line chart in Excel
Excel does not have a native step line chart type. The workaround requires restructuring your data so a standard line chart renders as steps.
Create a helper column that duplicates each data point. For step-after behavior, each value appears twice: once at its original timestamp and once at the next timestamp with the same value. This forces horizontal segments.
The number of points in your restructured data should be roughly double the original. If not, check for missing duplicates.
One frequent build error: forgetting the final point. The last value needs a duplicate extending to the end of your time range, or the chart ends abruptly.
This workaround is manual and error-prone for large data sets, especially when nearly a third of analysts already spend over 40 percent of their time vetting and validating data. That time burden compounds when every data update requires regenerating the helper columns. For dashboards that refresh automatically, BI platforms with native step line charts reduce maintenance work and make it easier to share a governed, interactive view across finance, sales, and operations.
Alternatives to step line charts
If your data is genuinely continuous but you want to emphasize specific change points, consider a standard line chart with annotations at key moments rather than forcing a stepwise graph. The following table can help make your chart type choice more clear.
How to explain a step line chart in 30 seconds
Use this structure when presenting to someone unfamiliar with the format. 82 percent of decision-makers expect basic data literacy across all departments, yet only 39 percent of organizations provide training. That gap means your explanation may be the only context they get:
Step line chart limitations
Step line charts assume you know when changes occurred. If your data is sampled at intervals and the true change moment is unknown, the step placement is a guess. Sometimes a reasonable guess. Sometimes not.
Dense data with many small changes creates visual noise. Multi-series step charts become cluttered past three or four series.
The chart cannot show uncertainty. Each horizontal segment asserts a known, constant value. If your data has confidence intervals or measurement error, step lines don't communicate that. You'll notice this becomes a real problem in forecasting contexts, where the appearance of certainty can mislead stakeholders who don't realize the underlying data carries significant variance.